- Home
- Product Categories
- Audio Boards
- SparkFun Noisy Cricket Stereo Amplifier - 1.5W


SparkFun Noisy Cricket Stereo Amplifier - 1.5W
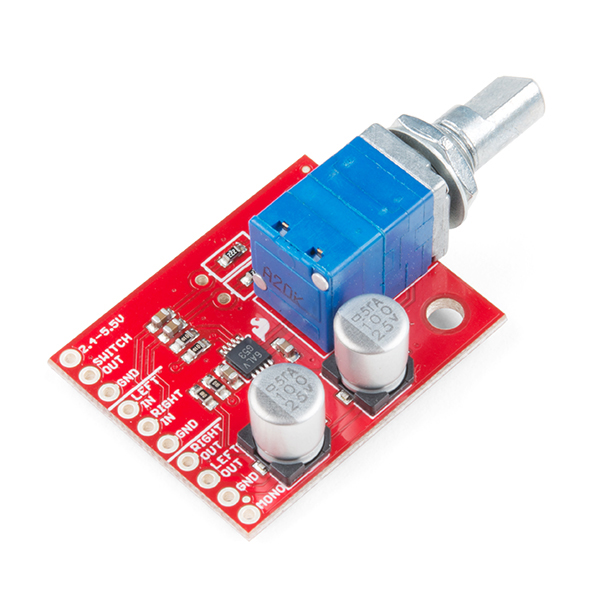
You won't need a series four de-atomizer with our rendition of the Noisy Cricket, just wire it up and crank up your tunes! The Noisy Cricket Stereo Amplifier, uses the LM4853 Boomer® IC which can be configured to output up to 1.5W of power in mono operation (4Ω load) or 300mW per channel in stereo operation (8Ω load). The amplifier comes with a dual-ganged pot with a built-in switch to control power and adjust both left and right channel gain.
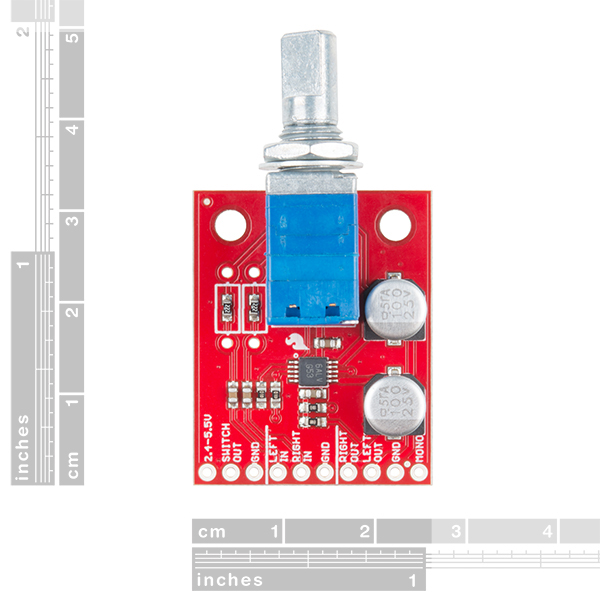
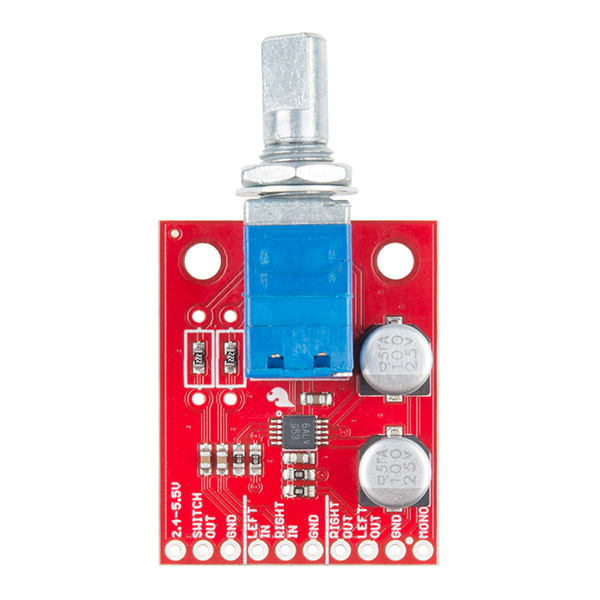
The SparkFun Noisy Cricket has been designed as an easy to use board with three connection sections, Power, Input, and Output. The power section features three connections, VCC, VCC OUT, and GND all only requiring a voltage range of 2.4-5.5VDC but with only one connection. Meanwhile, the Input and Output sections both have connections for GND, LEFT IN/OUT, and RIGHT IN/OUT for your audio inputs and outputs. It is important to point out that the Output section of the board does feature an extra pin labeled "MONO," to use this pin (since the Noisy Cricket operates in Stereo out of the box) and get the full output power from the amplifier you’ll need to configure the Noisy Cricket as a mono amplifier, that way the left and right input channels will be combined to drive a single speaker. To enable mono operation all you will need to do is solder two jumper pads on the back of the board labeled ENABLE MONO OUTPUT and MONO BASS BOOST.
With the SparkFun Noisy Cricket Amplifier, you will be provided with a board that fits into the palm of your hand that requires minimal setup that allows you to utilize both stereophonic and monaural sound!
- Class AB Amplifier
- 2.4-5.5VDC Supply
- Mono - 1.5W into 4 Ohms
- Stereo - 300mW into 8 Ohms
- Dual Ganged Pot with built in switch to change left and right volume simultaneously, and control power
- PTH pads provided to change gain resistors if desired
- Solder jumper to switch between mono and stereo operating modes
- Schematic
- Eagle Files
- Hookup Guide
- Datasheet (LM4853)
- GitHub
SparkFun Noisy Cricket Stereo Amplifier - 1.5W Product Help and Resources
Noisy Cricket Stereo Amplifier - 1.5W Hookup Guide
April 26, 2018
A hookup guide for the Noisy Cricket Stereo Amplifier - 1.5W.
AzureWave Thing Plus (AW-CU488) Hookup Guide
September 22, 2022
The SparkFun AzureWave Thing Plus is a Feather form-factor development board equipped with the AW-CU488. We'll highlight key features of the board and show you to get started with the development board. A few Arduino examples will be highlighted to connect to a WiFi router, calculate the Fast Fourier Transform (FFT) from an input microphone, output an analog signal to a speaker, and connect an Qwiic-enabled device.
Core Skill: Soldering
This skill defines how difficult the soldering is on a particular product. It might be a couple simple solder joints, or require special reflow tools.
Skill Level: Noob - Some basic soldering is required, but it is limited to a just a few pins, basic through-hole soldering, and couple (if any) polarized components. A basic soldering iron is all you should need.
See all skill levels
Core Skill: Programming
If a board needs code or communicates somehow, you're going to need to know how to program or interface with it. The programming skill is all about communication and code.
Skill Level: Rookie - You will need a better fundamental understand of what code is, and how it works. You will be using beginner-level software and development tools like Arduino. You will be dealing directly with code, but numerous examples and libraries are available. Sensors or shields will communicate with serial or TTL.
See all skill levels
Core Skill: Electrical Prototyping
If it requires power, you need to know how much, what all the pins do, and how to hook it up. You may need to reference datasheets, schematics, and know the ins and outs of electronics.
Skill Level: Rookie - You may be required to know a bit more about the component, such as orientation, or how to hook it up, in addition to power requirements. You will need to understand polarized components.
See all skill levels
Comments
Looking for answers to technical questions?
We welcome your comments and suggestions below. However, if you are looking for solutions to technical questions please see our Technical Assistance page.
Customer Reviews
5 out of 5
Based on 1 ratings:
Love it. Plenty loud in Mono mode
Using it to get some sound out of a Raspberry Pi. Cricket is easy, reliable. Side note: USB headphone adapter (mine is ugreen) provided higher volume than the native Raspberry headphone jack.
Some remarks: Love the form factor and price. So happy to see an amp board that includes a volume pot, and it's even ready to panel mount! No need to mount the board itself since it can be supported by the pot mounting nut. Minor disappointment: One of the nice features of this chip is that it can drive a mono speaker at speaker power, then automatically switch over to driving stereo headphones at headphone power when you plug them in. This breakout doesn't make this possible without greenwire and careful soldering.
If you're having issues with mono output, read the full hookup guide before you spend hours trying to diagnose shielding or power supply issues. The mono pin is mono GROUND, not mono output. Mono output is the left channel as usual. I suppose it's my own fault for not fully reading the docs first, but I feel like that could be labeled better too (or mentioned in the description where it refers to the mono output pin). If you hook it up wrong (using mono and ground), it will still mostly work, you'll just get a huge pulse to the speaker coil every two or three seconds interrupting any playback and making an obnoxious thumping/clicking noise even with nothing playing (at least that's what happened to me)...
One of the first things I did was come check these comments to see if anyone else was having similar issues...so I figured I'd leave the solution here for others (or, more likely, for myself the next time I try using one of these!)