- Home
- Product Categories
- Raspberry Pi HATs
- SparkFun Qwiic SHIM for Raspberry Pi


SparkFun Qwiic SHIM for Raspberry Pi
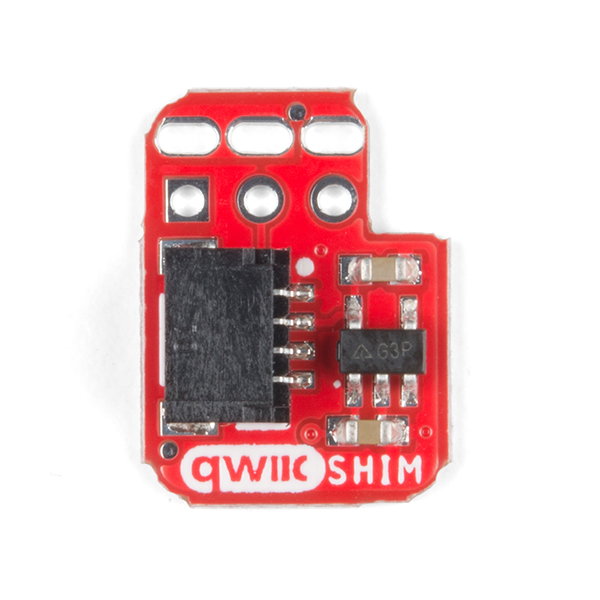
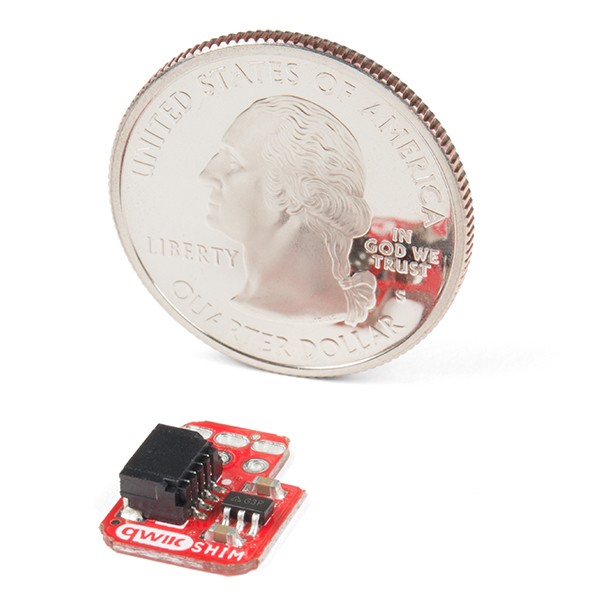
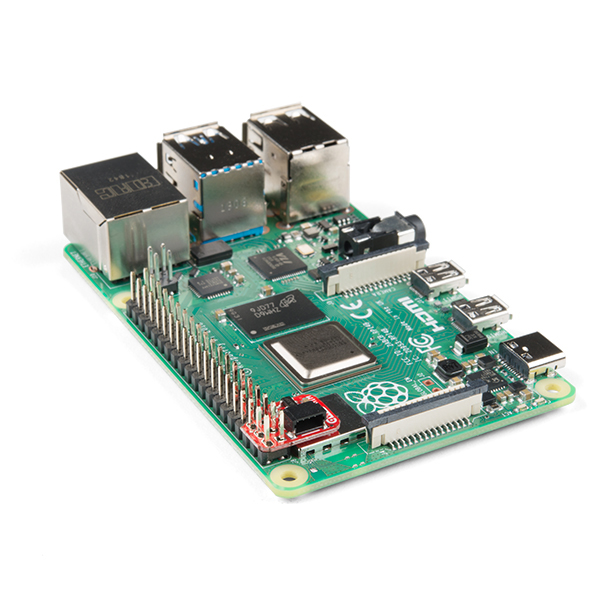
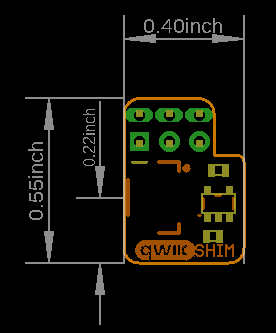
The SparkFun Qwiic SHIM for Raspberry Pi is a small, easily removable breakout that easily adds a Qwiic connector to your Raspberry Pi. The SHIM design allows you to plug directly to the Pi's I2C bus with no soldering required and the thin PCB design allows for it to be sandwiched on your Pi GPIO with other HATs! The Qwiic SHIM works great when you do not need the full capabilities of the Qwiic pHAT for Raspberry Pi or if you want to add a Qwiic connector to your Pi but do not have room for yet another HAT.
The Qwiic SHIM uses a unique friction-based connector that wedges itself onto the GPIO header for a secure, solderless connection. As you would expect, it has a single Qwiic connector that connects to your Pi's I2C bus (SDA, SCL, 5V and Ground). The SHIM also has a 3.3V regulator so it will work with all Qwiic devices. Even better, the SparkFun Qwiic SHIM will also work with the NVIDIA Jetson Nano Developer Kit!
The SparkFun Qwiic Connect System is an ecosystem of I2C sensors, actuators, shields and cables that make prototyping faster and less prone to error. All Qwiic-enabled boards use a common 1mm pitch, 4-pin JST connector. This reduces the amount of required PCB space, and polarized connections mean you can’t hook it up wrong.
- Small Form Factor
- HAT Stackable
- Fits inside Protective Case
- No Soldering Required
- Qwiic Connector
SparkFun Qwiic SHIM for Raspberry Pi Product Help and Resources
Qwiic SHIM for Raspberry Pi Hookup Guide
December 5, 2019
Ever wanted to prototype I2C components on a Pi? Now you can!
Qwiic SHIM Kit for Raspberry Pi Hookup Guide
February 16, 2021
Get started with the Serial LCD with RGB backlight and 9DoF IMU (ICM-20948) via I2C using the Qwiic system and Python on a Raspberry Pi! Take sensor readings and display them in the serial terminal or SerLCD.
Raspberry Pi 4 Kit Hookup Guide
March 14, 2020
Guide for hooking up your Raspberry Pi 4 Model B basic, desktop, or hardware starter kit together.
Loose Connection
There are small manufacturing tolerances between the headers, the shim, and the Raspberry Pi that could cause loose connections. To fix this, one could:
Lightly bend the Pi headers "outward" slightly
Melt solder into the shim header holes and then slap it out, like in this tutorial: https://www.sparkfun.com/news/802. This is not soldering the SHIM to the Pi Headers, just filling the hole and then removing the solder, leaving a small layer of solder behind to make a better connection.
Combination of 1 & 2
Please keep in mind that these methods are physically altering your products and could amount in damage to the products if not done carefully. Please use them at your own discretion.
Core Skill: Electrical Prototyping
If it requires power, you need to know how much, what all the pins do, and how to hook it up. You may need to reference datasheets, schematics, and know the ins and outs of electronics.
Skill Level: Rookie - You may be required to know a bit more about the component, such as orientation, or how to hook it up, in addition to power requirements. You will need to understand polarized components.
See all skill levels
Comments
Looking for answers to technical questions?
We welcome your comments and suggestions below. However, if you are looking for solutions to technical questions please see our Technical Assistance page.
Customer Reviews
2.6 out of 5
Based on 13 ratings:
1 of 1 found this helpful:
Doesn't work
The friction based connectors simply don't make solid contact with the raspberry pi headers without solder, and the spacing of the components makes it difficult to non-destructively solder with a soldering iron.
By wedging and bending things in just the right way, I could kind of sort of get it to work, but I ultimately found that using a simple Qwiic to female jumper cable like this one (https://www.sparkfun.com/products/14988) was much easier and more reliable.
1 of 1 found this helpful:
Works great, but only if you solder it in place.
The friction fit isn't even close to usable on a Raspberry Pi 4. Don't even bother, but solder it in place and it works great!
1 of 1 found this helpful:
Works intermittently when not used with something to hold it down.
Does not "grab" onto the pins well enough to be a reliable connection. One little twitch of the wire and your module is disconnected. I bought this thinking it would make a great connector inside a Raspberry pi case...but it doesn't work on its own. It has to have something on top of it to make it a reliable connection. I ended up soldering it on as I needed to get the project finished, Oh well - if you don't mind soldering it on then it works great!
1 of 1 found this helpful:
Connectors too loose
Same issues as other comments, the connectors aren't tight enough on the pins to guarantee a good connection. When I set mine on a PI 3B, gravity just tilts it to the side and while the 5v pin & ground seems fine, it 's titled in such a manner that its pads don't contact the sda & scl pins. I even tried it with a pi hat on top of it(because that's the ideal use case for pi shims), because after I couldn't get it to stay still I figured it needed to be pinned down by the connectors on one, but even when held in by the connectors of the pi hat it still failed to work. How did this get past QC?
Sorry about that! We had some bad boards but have made some changes that should correct this in the future.
2 of 2 found this helpful:
Loose connections render it useless
Great idea, poor execution. The holes for the header pins are so loose it wiggles. I could not get a solid connection without pushing the board against the pins with quite a bit of force. Tested on two different Pis, same issue. Soldered the connections instead.
1 of 1 found this helpful:
same loose connection as others
Couldn't figure out why it was so fussy. Sign. I ended up soldering it onto the pins, which definitely defeats the purpose.
3 of 3 found this helpful:
Nifty, but fidgety for solid connections.
The friction fit on the 2 shims I bought is a bit loose. If you don't get it set just right, possibly with some tape under the end away from the pins, you may see intermittent connections.
It might also be nice to have a "blank" for the other end of the header pins so that whatever you stack on top stays level.
README: Works good, but buy female headers with this!
Before purchasing this, make sure you add 2x3+ female headers so you can get a good solder connection without soldering directly to the RPi! Sparkfun has some here (https://www.sparkfun.com/products/16581); just cut off a 2x3 section with some wire cutters and solder to the bottom of this board.
Sparkfun should honestly change the description to remove "solderless" and encourage people to purchase some female headers with this.
The connection is loose
I have to hold down the shim on my RPi in order to get a connection. The python library and examples are also not that easy to follow and some of Sparkfun's methods seem to have incorrect names (e.g., connected_devices instead of connectedDevices)
Easy to use
It does exactly what it's supposed to. Easy to install, and allows using Qwiic cables to connect to I2C sensors.
Just what I needed
The shim for Qwiic connections to the Pi makes for a perfect link to start using sensors with Qwiic connections.
What would also be nice is a similar device that isn't a shim, but a connector for those who don't need to sit anything else on the Pi pins.
Does not work
I have purchased several SHIMs and not one has worked. I soldered one in and it worked fine, but that's a silly fix to something that is supposed to be friction fit. I saw a response a couple years ago about a bad lot, but this was recent. When will this be corrected?
Make sure you buy some female headers (https://www.sparkfun.com/products/16581) so you can solder this board to those instead of soldering directly to the RPi's headers. This board is by no means "solderless"