- Home
- Product Categories
- Color
- SparkFun MicroMod Input and Display Carrier Board

SparkFun MicroMod Input and Display Carrier Board
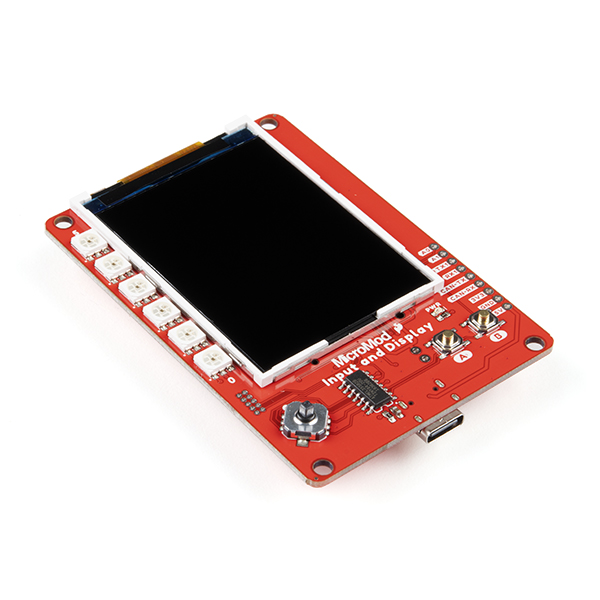
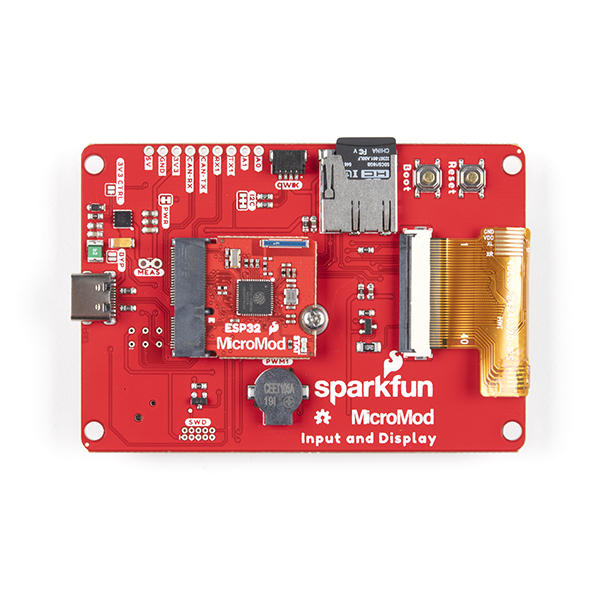
The SparkFun MicroMod Input and Display Carrier Board is a great way to add data and input visibility to your MicroMod project. Want to create your own embedded game? How about displaying data that is remotely collected and transmitted by your SparkFun MicroMod Weather Carrier Board and its processor? This is a great option.
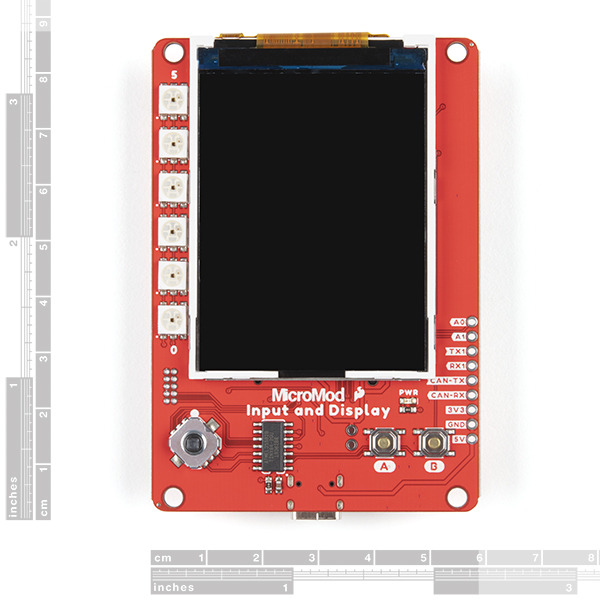
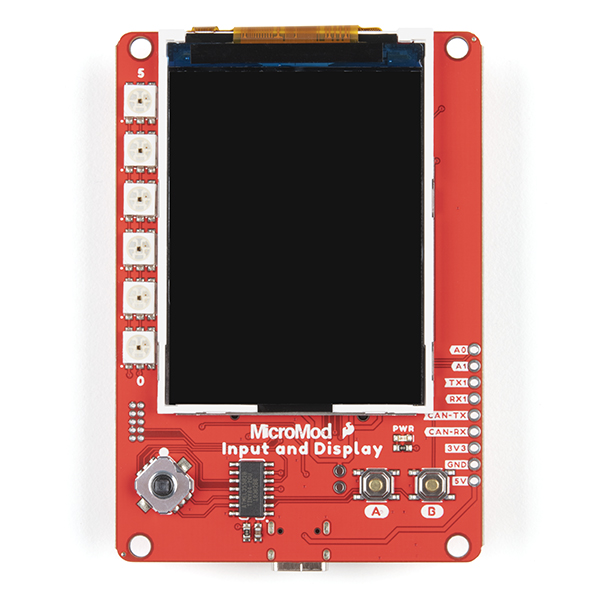
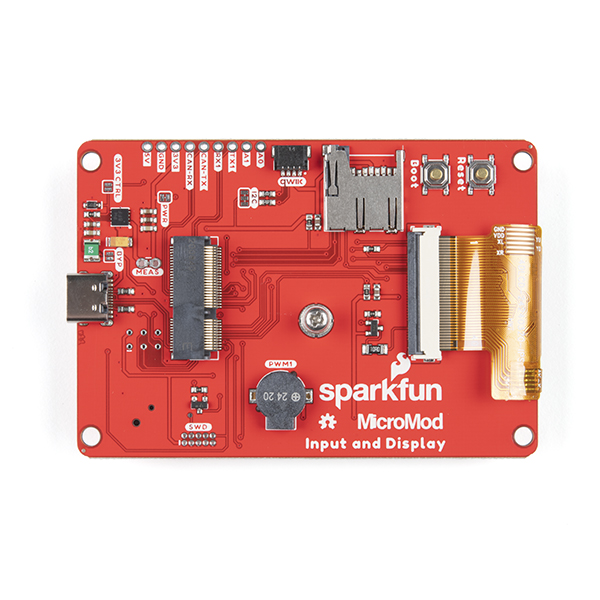
This carrier board combines a 2.4" TFT display, six addressable LEDs, onboard voltage regulator, a 6-pin IO connector, and microSD slot with the M.2 pin connector slot so that it can be used with compatible processor boards in our MicroMod ecosystem. We've also populated this carrier board with Atmel's ATtiny84 with 8kb of programmable flash. This little guy is preprogrammed to communicate with the processor over I2C to read button presses.
MicroMod is a modular interface ecosystem that connects a microcontroller “processor board” to various “carrier board” peripherals. Utilizing the M.2 standard, the MicroMod standard is designed to easily swap out processors on the fly. Pair a specialized carrier board for the project you need with your choice of compatible processor!
- M.2 MicroMod Connector
- 240 x 320 pixel, 2.4" TFT display
- 6 Addressable APA102 LEDs
- Magnetic Buzzer
- USB-C Connector
- 3.3V 1A Voltage Regulator
- Qwiic Connector
- Boot/Reset Buttons
- RTC Backup Battery & Charge Circuit
- microSD
- Phillips #0 M2.5x3mm screw included
MicroMod Input and Display Carrier Documentation:
- Schematic
- Eagle Files
- Hookup Guide
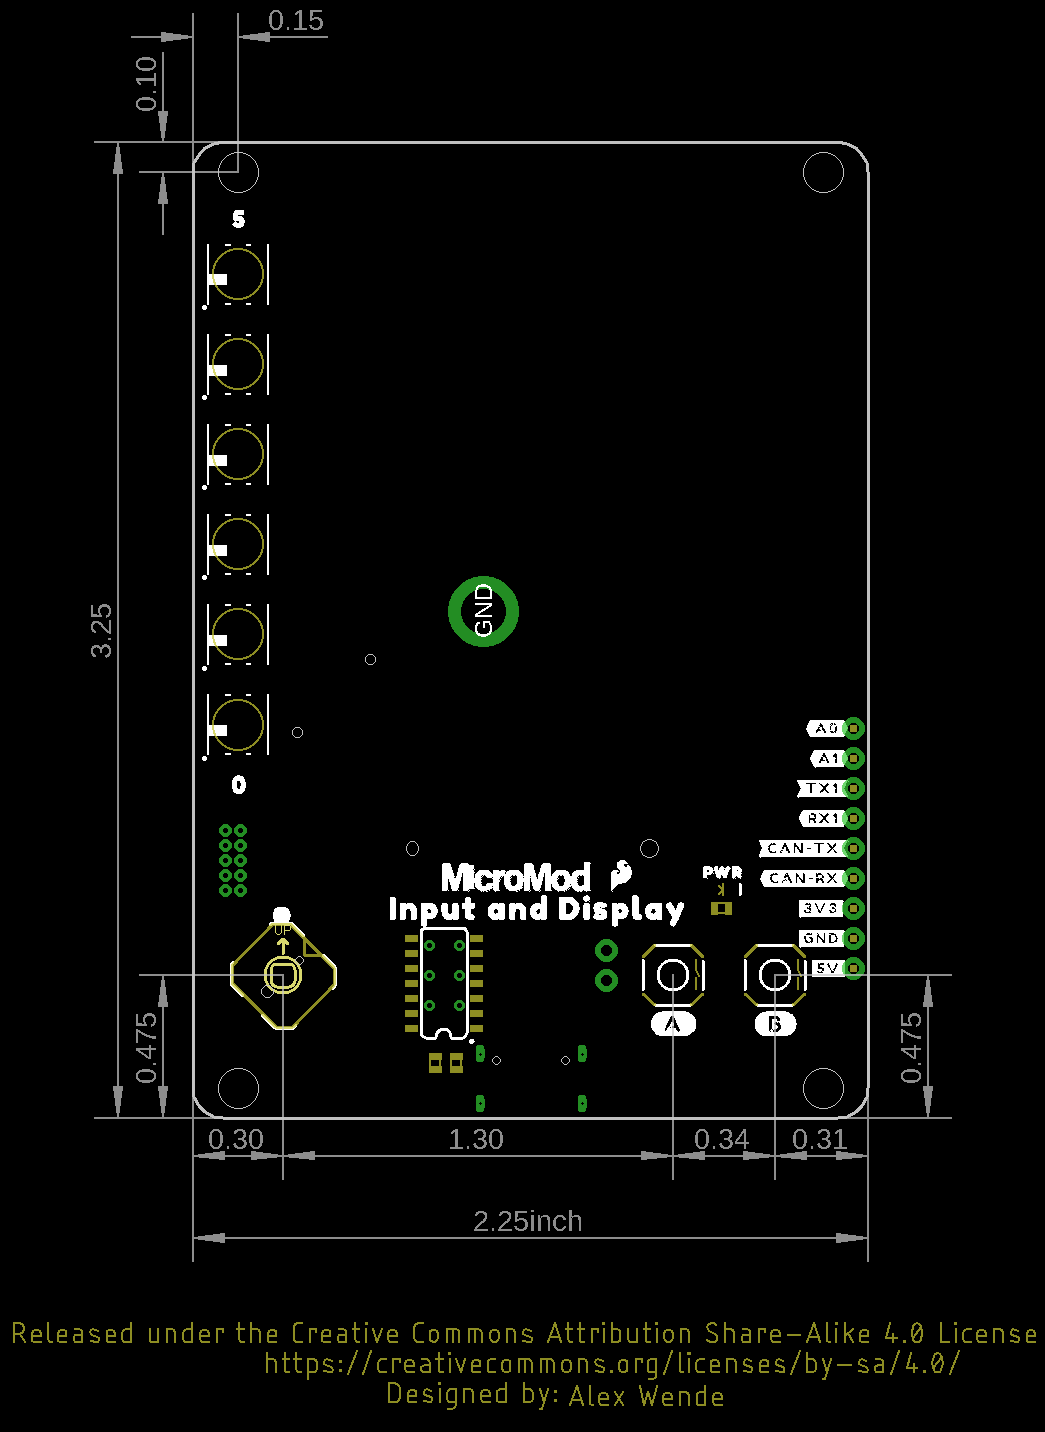
- Dimensional Drawing
- TFT Display Datasheet
- SparkFun HyperDisplay Arduino Library
- SparkFun HyperDisplay ILI9341 Arduino Library
- SparkFun HyperDisplay 4DLCD-320240 Arduino Library
- GitHub Hardware Repo
MicroMod Documentation:
SparkFun MicroMod Input and Display Carrier Board Product Help and Resources
SparkFun MicroMod Input and Display Carrier Board Hookup Guide
October 21, 2020
A short Hookup Guide to get started with the SparkFun MicroMod Input and Display Carrier Board
Designing with MicroMod
October 21, 2020
This tutorial will walk you through the specs of the MicroMod processor and carrier board as well as the basics of incorporating the MicroMod form factor into your own PCB designs!
MicroMod STM32 Processor Hookup Guide
May 13, 2021
Get started with the MicroMod Ecosystem and the STM32 Processor Board!
MicroMod ESP32 Processor Board Hookup Guide
October 21, 2020
A short hookup guide to get started with the SparkFun MicroMod ESP32 Processor Board.
Getting Started with MicroMod
October 21, 2020
Dive into the world of MicroMod - a compact interface to connect a microcontroller to various peripherals via the M.2 Connector!
Core Skill: DIY
Whether it's for assembling a kit, hacking an enclosure, or creating your own parts; the DIY skill is all about knowing how to use tools and the techniques associated with them.
Skill Level: Noob - Basic assembly is required. You may need to provide your own basic tools like a screwdriver, hammer or scissors. Power tools or custom parts are not required. Instructions will be included and easy to follow. Sewing may be required, but only with included patterns.
See all skill levels
Core Skill: Programming
If a board needs code or communicates somehow, you're going to need to know how to program or interface with it. The programming skill is all about communication and code.
Skill Level: Competent - The toolchain for programming is a bit more complex and will examples may not be explicitly provided for you. You will be required to have a fundamental knowledge of programming and be required to provide your own code. You may need to modify existing libraries or code to work with your specific hardware. Sensor and hardware interfaces will be SPI or I2C.
See all skill levels
Core Skill: Electrical Prototyping
If it requires power, you need to know how much, what all the pins do, and how to hook it up. You may need to reference datasheets, schematics, and know the ins and outs of electronics.
Skill Level: Rookie - You may be required to know a bit more about the component, such as orientation, or how to hook it up, in addition to power requirements. You will need to understand polarized components.
See all skill levels
Comments
Looking for answers to technical questions?
We welcome your comments and suggestions below. However, if you are looking for solutions to technical questions please see our Technical Assistance page.
Customer Reviews
3.7 out of 5
Based on 3 ratings:
1 of 1 found this helpful:
No text
I bought it with ESP processor. Examples compile and run fine; shows lines, boxes, and colors fine, but no text. I started a forum thread but no solution for me yet. I guess others have resolved it but it eludes me. Guess I'm not a power user here. I've almost given up. Another feed back is that your online howto on this board does not mention anywhere that you need to press the boot button in order for Arduino IDE to upload code. Maybe not being a power user is the problem here as well. Anyway, my 2 cents. Paul
A good idea, but poor execution on the software side
I have spent too much time working out the nuances of this board. There is only one example of the functionality of this board, namely the display. Had to spend the best part of three weeks to get to use the WIFI on the ESP32 processing board and to write data to the SD card. I have yet to work out the APA102, which I sorely need.
Seems like this was rushed to the marketplace with a lack of examples. How can the true potential of the board be unlocked without code examples? The forum does not seem to be a very active place.
Needs work
I am having a hard time with your micromod products. I have collected qwiic products to use with them. I am trying to use micropython. I have had problems with finding consistent pinout diagrams across your products in the same product line. I have a hard time finding what to call the quiic lines in micropython on the different RP2040 products. I liked the carrier product line but can’t find simple things with the right size with the 4 holes. My sparkx collection is more apt to fit the carrier boards than your red product line. Simple things like a real time clock (RTC module) with a real coin battery, not a super capacitor to fit the carrier boards is missing. It seems you are trying to stay with Arduino rather than providing python based products when Arduino is getting so fragmented that it is getting much harder for the hobbyist to use. I also would like to see larger displays that can be used with micropython. For the record I am an elderly hobbyist person who is trying to use python as the new language to use to keep my brain active. It has been said that you should learn a new language to keep your brain active in your old age. My background requires that to be a computer language as my first one was IBM 360 assembly language on million dollar mainframes.
Is there a single micromod processor that can take advantage of every feature this carrier provides? I've tried with the ESP32, Teensy, and STM32 with no luck. They all fall short on at least one thing, the STM32 and Teensy aren't compatible with the FastLed library as hooked up here and the ESP32 doesn't support CAN. I bought this carrier because I want to use literally every feature it 'offers'.