- Home
- Product Categories
- Raspberry Pi Kits
- SparkFun Qwiic SHIM Kit for Raspberry Pi

SparkFun Qwiic SHIM Kit for Raspberry Pi
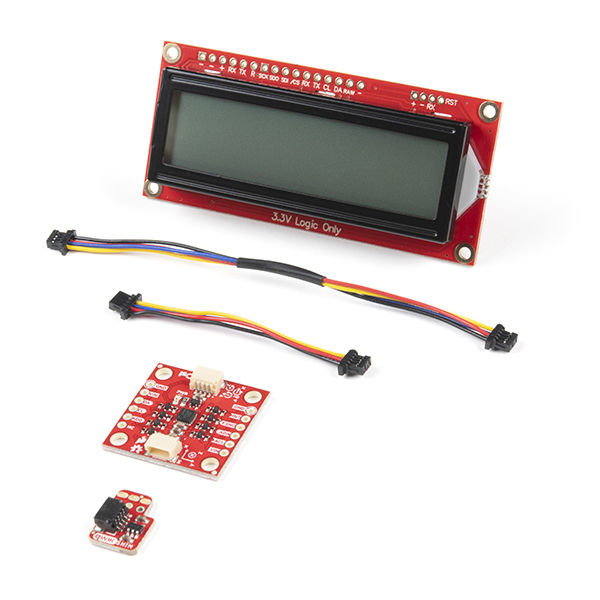
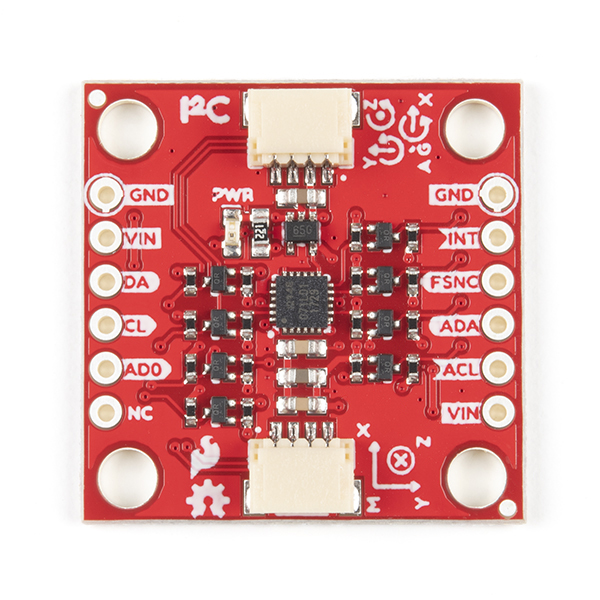
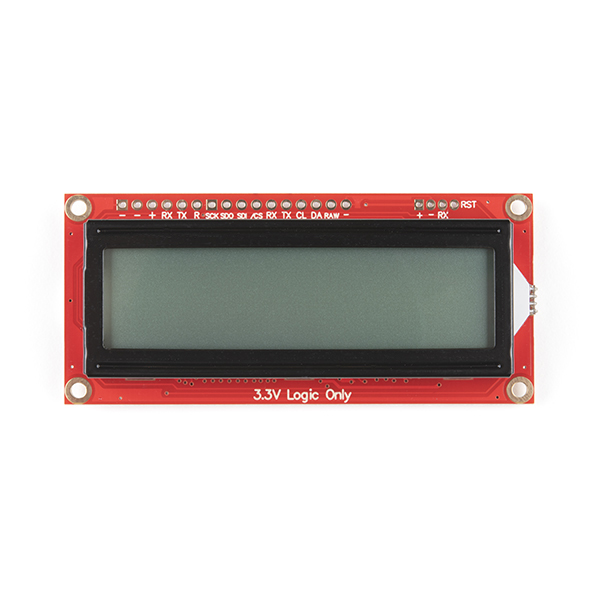
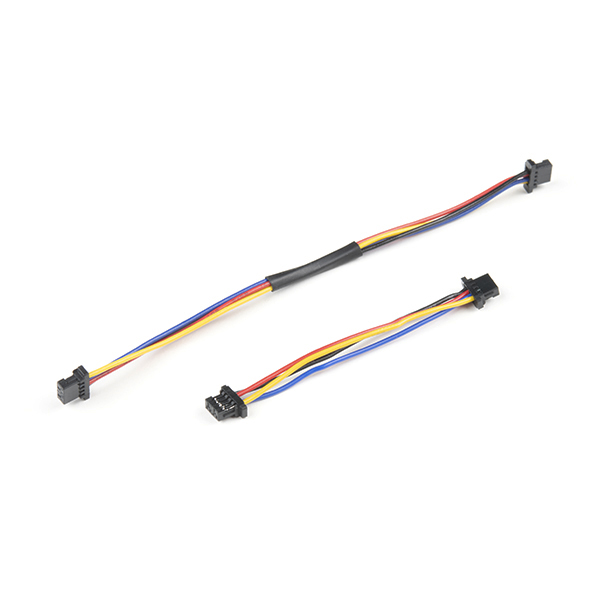
The SparkFun Qwiic SHIM Kit for Raspberry Pi comes with everything you need to turn your Raspberry Pi into a fully Qwiic-enabled device. With this kit, you will receive a SparkFun Qwiic SHIM for Raspberry Pi, a Qwiic SerLCD, an ICM-20948 9DoF IMU Breakout, and the necessary cables needed to hook everything together. If you've ever been interested in getting your Raspberry Pi connected with the Qwiic Connect System, you won't find an easier way than with the SparkFun Qwiic SHIM Kit.
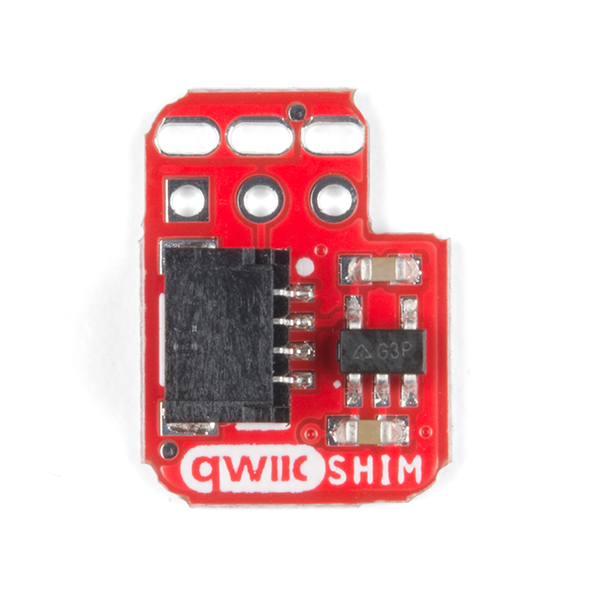
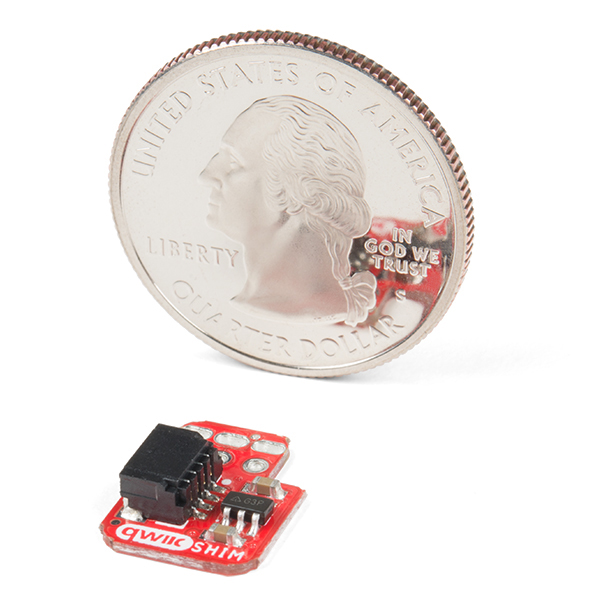
The SparkFun Qwiic SHIM for Raspberry Pi, included in this kit, is a small, easily removable breakout to add a Qwiic connector to your Raspberry Pi. The SHIM allows you to plug directly to the Pi's I2C bus with no soldering required and the thin PCB design allows for it to be sandwiched on your Pi GPIO with other HATS. The Qwiic SHIM works great when you do not need the full capabilities of the Qwiic pHAT for Raspberry Pi or if you want to add a Qwiic connector to your Pi but do not have room for yet another HAT.
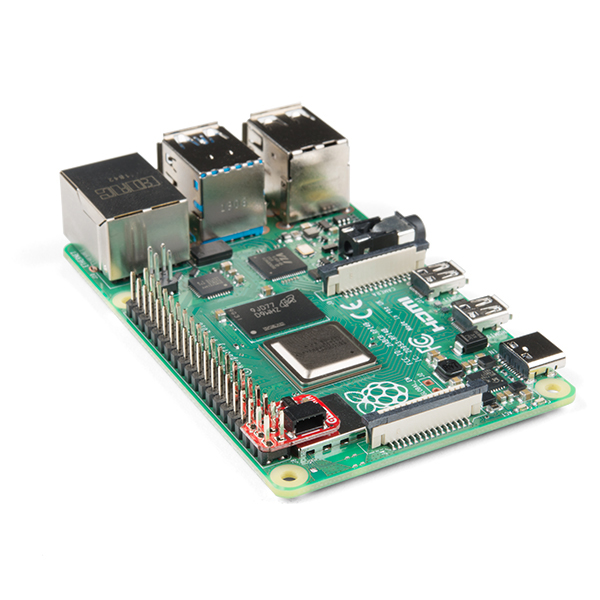
Note: This kit does not include a Raspberry Pi. A desired Raspberry Pi development board will need to be purchased separately. Check the Hookup Accessories section below for Raspberry Pi options and the Includes tab above for everything included in this kit.
The SparkFun Qwiic Connect System is an ecosystem of I2C sensors, actuators, shields and cables that make prototyping faster and less prone to error. All Qwiic-enabled boards use a common 1mm pitch, 4-pin JST connector. This reduces the amount of required PCB space, and polarized connections mean you can’t hook it up wrong.
SparkFun Qwiic SHIM Kit for Raspberry Pi Product Help and Resources
SparkFun 9DoF IMU (ICM-20948) Breakout Hookup Guide
June 27, 2019
How to use the SparkFun 9DoF ICM-20948 breakout board for your motion sensing projects. This breakout is ideal for wearable sensors and IoT applications.
Qwiic SHIM for Raspberry Pi Hookup Guide
December 5, 2019
Ever wanted to prototype I2C components on a Pi? Now you can!
Qwiic MultiPort Hookup Guide
April 1, 2021
The SparkFun Qwiic MultiPort adds additional ports to boards that have only one Qwiic port on their I2C bus. Once added, you can use it as a hub to add as many I2C devices to the bus as you need! You can also use the board as an alternative to a daisy chained configuration.
AVR-Based Serial Enabled LCDs Hookup Guide
August 2, 2018
The AVR-based Qwiic Serial Enabled LCDs are a simple and cost effective solution to include in your project. These screens are based on the HD44780 controller, and include ATmega328P with an Arduino compatible bootloader. They accept control commands via Serial, SPI and I2C (via PTH headers or Qwiic connector). In this tutorial, we will show examples of a simple setup and go through each communication option.
Qwiic SHIM Kit for Raspberry Pi Hookup Guide
February 16, 2021
Get started with the Serial LCD with RGB backlight and 9DoF IMU (ICM-20948) via I2C using the Qwiic system and Python on a Raspberry Pi! Take sensor readings and display them in the serial terminal or SerLCD.
Core Skill: Programming
If a board needs code or communicates somehow, you're going to need to know how to program or interface with it. The programming skill is all about communication and code.
Skill Level: Competent - The toolchain for programming is a bit more complex and will examples may not be explicitly provided for you. You will be required to have a fundamental knowledge of programming and be required to provide your own code. You may need to modify existing libraries or code to work with your specific hardware. Sensor and hardware interfaces will be SPI or I2C.
See all skill levels
Core Skill: Electrical Prototyping
If it requires power, you need to know how much, what all the pins do, and how to hook it up. You may need to reference datasheets, schematics, and know the ins and outs of electronics.
Skill Level: Rookie - You may be required to know a bit more about the component, such as orientation, or how to hook it up, in addition to power requirements. You will need to understand polarized components.
See all skill levels
Comments
Looking for answers to technical questions?
We welcome your comments and suggestions below. However, if you are looking for solutions to technical questions please see our Technical Assistance page.
Customer Reviews
No reviews yet.
OK so I purchased the SparkFun Qwiic SHIM Kit for Raspberry Pi Only 9 left! KIT-16987 Do you have any code or tutorial for the kit?
Ah sorry! I was working on a tutorial so that the instructions are in one location but it got reprioritized with other projects. I'm waiting for pictures. If you have not already, you will need to have the Pi's I2C port enabled, Python 3 set as your default, and the Qwiic_Py package installed.
Download the Examples
There are Python examples for the ICM-20948 and the SerLCD. I recommend opening a terminal and using the
git clonecommand to copy the examples in your working directory. Git should be installed by default on a standard Raspbian image. For the 9D0F, you will enter this command.For the SerLCD, you will enter this command.
Exploring Examples Folder
If you explore the folders, there will be one specifically for examples. Head to that folder with the
cdcommand. For the 9DoF, you will enter this command.For the SerLCD, you will enter this command.
You can use the
lscommand to see what examples are included when in the folder.Running the Examples
Once you are in the examples folder and have viewed what is available, you can use the
pythoncommand to run the example. If you did not make an alias for the command, you will need to usepython3. For the 9DoF, you will enter this command.For the SerLCD, you will enter this command.
Hitting
CTRL+Cwill exit the program.Editing Examples
Feel free to experiment and adjust the code by opening it up with a text editor. You could use the built-in text editor for the Raspberry Pi terminal with the
nanocommand.I actually prefer to use a either Thonny or Geany to edit and run examples. These should be installed by default for standard Raspbian images with recommended software. To open it up from the command line using Thonny, enter this command to open it in the background.
If you prefer the GUI, you can also head to Raspberry Pi Start Menu > Programming, clicking on your favorite editor, and copy/pasting the examples from the GitHub repositories. Hope this helps!